The Shelf
Give a Screening Room or its media to another Mnemonica user with the Shelf, and receive a Shelf item.
- Progetti
- ProductionArchive
- Ruoli
- Manager
- Aggiornato
The Shelf is a temporary exchange area. Use it to give the ownership of a Screening Room, or of one or more media in it, to another registered user. That user can then use the content freely.
When recipients get the "New Shelf available" notification, they can save the content in any Project where they have Manager permissions. The Project can belong to a different Company.
To open the Shelf, click the Hub icon in the top-right corner of the screen.
All Shelf items have a 24-hour lifespan. After 24 hours, Mnemonica deletes them.
Creating a Shelf item
The media type is based on best availability. For example, if you have only 50% of the original media, Mnemonica takes the other 50% from the Proxies.
Open the Shelf
Open the Hub and select the Shelf tab.
Select the Room or media
On the dashboard, find the Room or media you want to give away. Drag it to the right and release it on the drop area that appears on the Shelf. Or choose Add to Shelf... from the options menu of the Room or media.
Fill in the dialog
- In Shelf name, type a name for the Shelf item (up to 64 characters).
- In Receiver email, type the email address of the recipient. The recipient must already be a Mnemonica user.
- Select the Media type to put on the Shelf: Original, Proxy or Watermark*.
Shelve the item
Click Shelve.
Receiving a Shelf item
Importing a Shelf item is the same as uploading content to a Project. The duration of the import and the storage used depend on the media type of the item and the settings of the destination Screening Room.
Open the Shelf
Enter the destination Project and go to the Rooms page. Open the Shelf and find the Shelf item you want to import.
Import the item
Drag the Shelf item onto the dashboard. Drop it on an existing Room, or on the add area (+) to create a new Room.
Or click the options button (⋮) of the Shelf item and choose:
- Unshelve to an existing Room...: select the Screening Room and, depending on the Room, the Day and the Bin. Then click Unshelve.
- Unshelve to a new Room...: enter the Name, choose the Room type (Standard, Collaborative Standard, Dailies or Collaborative Dailies) and set whether Guests can download content. Then click Unshelve.
- Unshelve to an existing Box... or Unshelve to a new Box...: save the content in a Box.
In Archive Projects, the menu also lists Unshelve to an existing Work... (select the Work, the Version and the Package), Unshelve to an existing Delivery... and Unshelve to a new Delivery.... The Box entries are not available in Archive Projects. The Work and Delivery entries are not available in Production Projects.
To remove a Shelf item, choose Delete.
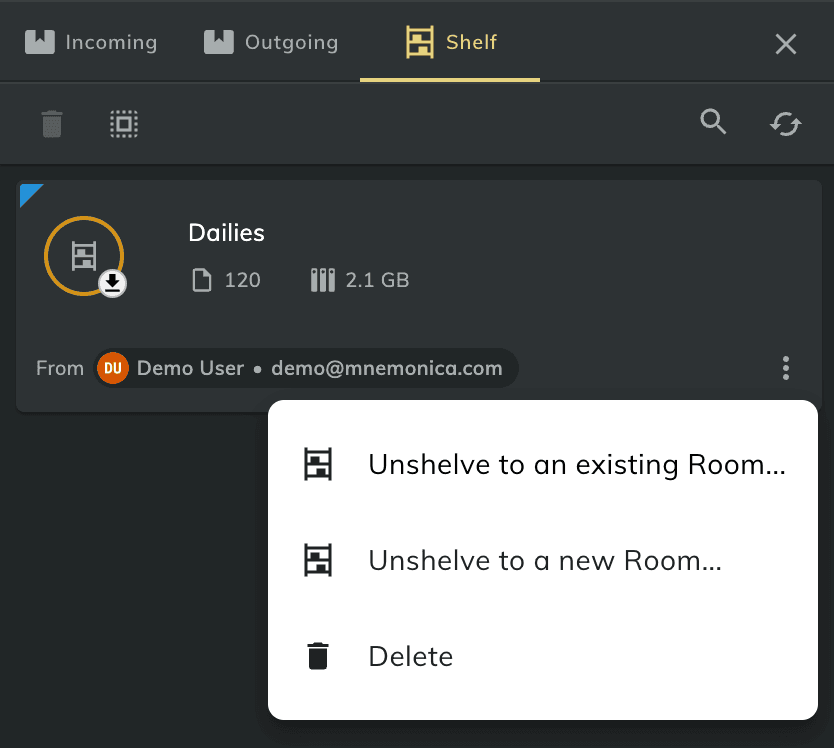
You can use the options button (⋮) of a Shelf item for any action.